Apply same validation rules on different classes with FluentValidation

In this blog post I will explain how to apply the same validation rules on the same properties in different classes with FluentValidation. This post will continue on the previous one where I explained how to create Custom Validators for your properties.

So in the previous example we had the Person class with a PersonValidator class. Let’s say you have some pages in your application to create and edit instances of that Person class. In order to create those pages, we use separate ViewModels for those pages. So let’s say you have a PersonCreateViewModel and a PersonEditViewModel. In this way, you have 3 classes with the same validation rules, because in example the property FirstName is the same in all those classes. If the validation rules of the FirstName changes (in example the MaxLength changes) you have to change the rules on 3 different places. If you forget to change it on one place a new bug is introduced.

Reuse validators for property

In order to reuse the validators we are going to extend the static CustomValidators class from our previous post. Again we are creating an extension method but now for the FirstName property. We put all the validation rules that we have for this FirstName in this custom validator. The end result will than be the following:

public static IRuleBuilderOptions<T, string> FirstNameValidation<T>(this IRuleBuilder<T, string> rule)
{
    return rule
        .NotEmpty()
        .NotNull()
        .MaximumLength(30)
        .NotStartWithWhiteSpace()
        .NotEndWithWhiteSpace();
}

We can now change the PersonValidator (and PersonCreateViewModel and PersonEditViewModel) to use the power of the new FirstNameValidation extension method. The end result will than be the following:

public class PersonValidator : AbstractValidator<Person>
{
    public PersonValidator()
    {        
        RuleFor(e => e.FirstName).FirstNameValidation();
        RuleFor(e => e.LastName).LastNameValidation();
    }
}

The PersonValidator class is now smaller and easier to read. The cool thing as well is that you can combine your custom FirstNameValidation extension method with your other extension methods as well. So when you have in example slightly different validation rules for your create and edit viewmodels you can use in example the FirstNameValidation method for the generic rules and add the specific rules in the particular validator class. See the following example where the edit viewmodel has extra validation rules:

public class PersonCreateViewModelValidator : AbstractValidator<PersonCreateViewModel>
{
    public PersonValidator()
    {        
        RuleFor(e => e.FirstName).FirstNameValidation();
        RuleFor(e => e.LastName).LastNameValidation();
    }
}

public class PersonEditViewModelValidator : AbstractValidator<PersonEditViewModel>
{
    public PersonValidator()
    {        
        RuleFor(e => e.FirstName).FirstNameValidation().NotContainWhiteSpace();
        RuleFor(e => e.LastName).LastNameValidation();
    }
}

Conclusion

Reusing validators saves you a lot of time and duplicate code. This will eventually result in less bugs. Nice is as well that your validator classes like the PersonValidator class is easier to read because it isn’t that long.

Creating custom validators with FluentValidation

This blog post will explain how creating custom validators with FluentValidation. A while back I wrote a blog post about how to start with FluentValidation in your project. In this post we will continue on that foundation.

Let’s say in example you have the class Person.

public class Person {
    public int Id { get; set; }     
    public string FirstName { get; set; }     
    public string LastName { get; set; }     
    public DateTime BirthDay { get; set; } 
}

You need to validate that Person class. So let’s say, you want to validate the FirstName and LastName property. Those properties are similar to each other because both are name and a string so both could have the same (custom) validators. 

So let’s create a PersonValidator class which of course will validate the Person class.

public class PersonValidator : AbstractValidator<Person>
{     
    public PersonValidator()  
    {                 
        RuleFor(e => e.FirstName).NotEmpty().MaximumLength(30);
        RuleFor(e => e.LastName).NotEmpty().MaximumLength(30);
    } 
}

Custom Validator

Now, you want to extend the basic validators. So let’s say you want a validator that the name must not start with a whitespace. You can validate this on multiple ways but the most logical way is to create a custom validator once and use that validator on multiple places.

Here is the validator for checking whitespaces in the begin or end of a string.

public static class CustomValidators 
{     
    public static IRuleBuilderOptions<T, string> NotStartWithWhiteSpace<T>(this IRuleBuilder<T, string> ruleBuilder)     
    {         
        return ruleBuilder.Must(m => m != null && !m.StartsWith(" ")).WithMessage("'{PropertyName}' should not start with whitespace");     
    }     
        
    public static IRuleBuilderOptions<T, string> NotEndWithWhiteSpace<T>(this IRuleBuilder<T, string> ruleBuilder)     
    {         
        return ruleBuilder.Must(m => m != null && !m.EndsWith(" ")).WithMessage("'{PropertyName}' should not end with whitespace");     
    } 
}

You can use the custom validators in the PersonValidator in the following way:

public class PersonValidator : AbstractValidator<Person> 
{     
    public PersonValidator()     
    {                 
        RuleFor(e => e.FirstName).NotEmpty().MaximumLength(30).NotStartWithWhiteSpace().NotEndWithWhiteSpace();         
        RuleFor(e => e.LastName).NotEmpty().MaximumLength(30).NotStartWithWhiteSpace().NotEndWithWhiteSpace();     
    } 
}

With this above custom validator is validating your objects very easy to do.

In the next blog post we go one step further. I will then show you how to apply the same validation rules on multiple classes.

FluentValidation in ASP.NET Core

FluentValidation is a wonderful validation package that is around for years. Last week I was busy with a new application in ASP.NET core. I wanted to add some validation and didn’t used FluentValidation in ASP.NET Core before. So I wanted to see if things where changed. This blog post contains some examples from the official FluentValidation Getting started documentation. In the next blog posts I will go into deeper validation of properties and reusing validators in different models.

Installation

For integration with ASP.NET Core, install the FluentValidation.AspNetCore package:

Install-Package FluentValidation.AspNetCore

Basic validation

Using the package is very easy. Let’s say you have to following class:

public class Customer {
  public int Id { get; set; }
  public string Surname { get; set; }
  public string Forename { get; set; }
  public decimal Discount { get; set; }
  public string Address { get; set; }
}

You would define a set of validation rules for this class by inheriting from AbstractValidator:

using FluentValidation; 

public class CustomerValidator : AbstractValidator&lt;Customer&gt; {
}

To specify a validation rule for a particular property, call the RuleFor method, passing a lambda expression that indicates the property that you wish to validate. For example, to ensure that the Surname property is not null, the validator class would look like this:

using FluentValidation;

public class CustomerValidator : AbstractValidator&lt;Customer&gt; {
  public CustomerValidator() {
    RuleFor(customer =&gt; customer.Surname).NotNull();
  }
}

To run the validator, instantiate the validator object and call the Validate method, passing in the object to validate.

Customer customer = new Customer();
CustomerValidator validator = new CustomerValidator();

ValidationResult result = validator.Validate(customer);

The following code would write any validation failures to the console:

if(! results.IsValid) {
  foreach(var failure in results.Errors) {
    Console.WriteLine("Property " + failure.PropertyName + " failed validation. Error was: " + failure.ErrorMessage);
  }
}

Deeper validation

In the next blog posts I will go into deeper validation with custom validators for properties and reusing validators in different models.

DbInitializer dotnet core 2.0

Seed database with users and roles in dotnet core 2.0

In this post I will explain how to seed database users roles dotnet core 2.0 ef. For this we use the UserManager and RoleManager of the AspNetCore Identity framework. In that way, your application already has a default user and role for in example logging into the application. You can use it for test data but also for new installations of your application. In my case I will create a default Administrator user with the Administrator role attached to it for new installations of the application.

Seeding a database in dotnet core 2.0 is different than earlier versions. I followed the basics of the new documentation of Microsoft to get to a good solution. So I first created a new project with the authentication set to Individual Accounts.

Program.cs

In the program.cs class I changed the code to the following:

public class Program
{
    public static void Main(string[] args)
    {
        var host = BuildWebHost(args);

        using (var scope = host.Services.CreateScope())
        {
            var services = scope.ServiceProvider;
            try
            {
                var context = services.GetRequiredService<ApplicationDbContext>();
                var userManager = services.GetRequiredService<UserManager<ApplicationUser>>();
                var roleManager = services.GetRequiredService<RoleManager<IdentityRole>>();

                var dbInitializerLogger = services.GetRequiredService<ILogger<DbInitializer>>();
                DbInitializer.Initialize(context, userManager, roleManager, dbInitializerLogger).Wait();
            }
            catch (Exception ex)
            {
                var logger = services.GetRequiredService<ILogger<Program>>();
                logger.LogError(ex, "An error occurred while seeding the database.");
            }
        }

        host.Run();
    }

    public static IWebHost BuildWebHost(string[] args) =>
        WebHost.CreateDefaultBuilder(args)
            .UseStartup<Startup>()
            .Build();
}

This is almost the same code as the documentation but I also injected a RoleManager and UserManager so we can create the default user and role for the application. When the instances are created the Initialize method of the DbInitializer is called. This can be used to seed your database.

Because I want to know more information about my users than just their email and username, I extended the ApplicationUser object that is used to create a user in the database with the UserManaer.

// Add profile data for application users by adding properties to the ApplicationUser class
public class ApplicationUser : IdentityUser
{

    public ApplicationUser()
        : base()
    {
    }
   
    public ApplicationUser(string userName, string firstName, string lastName, DateTime birthDay)
        : base(userName)
    {
        base.Email = userName;

        this.FirstName = firstName;
        this.LastName = lastName;
        this.BirthDay = birthDay;

    }

    [Required]
    [StringLength(50)]
    public string FirstName { get; set; }

    [Required]
    [StringLength(50)]
    public string LastName { get; set; }

    [Required]
    [DataType(DataType.Date)]
    public DateTime BirthDay { get; set; }

    public string FullName => $"{this.FirstName} {this.LastName}";
}

I like constructors for new objects so I will use the long constructor to create my default user.

DbInitializer

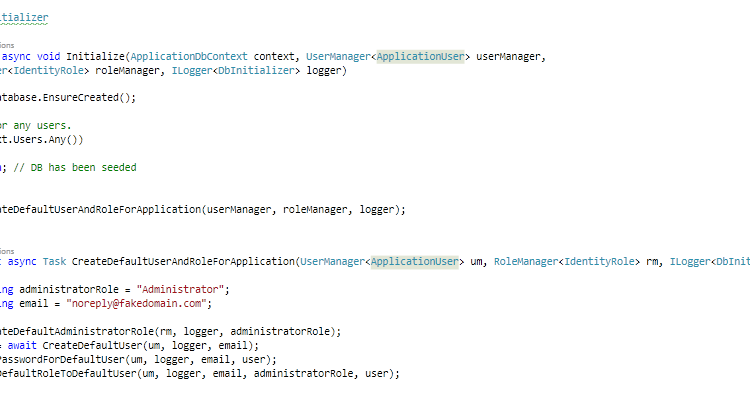
The DbInitializer is the class that is used to seed the database. It is created by the program class. It has a static method Initialize that will be used to pass the external dependencies. The Initialize method will be used to orchestrate all the actions.

public class DbInitializer
{
    public static async Task Initialize(ApplicationDbContext context, UserManager<ApplicationUser> userManager,
        RoleManager<IdentityRole> roleManager, ILogger<DbInitializer> logger)
    {
        context.Database.EnsureCreated();

        // Look for any users.
        if (context.Users.Any())
        {
            return; // DB has been seeded
        }

        await CreateDefaultUserAndRoleForApplication(userManager, roleManager, logger);
    }

    private static async Task CreateDefaultUserAndRoleForApplication(UserManager<ApplicationUser> um, RoleManager<IdentityRole> rm, ILogger<DbInitializer> logger)
    {
        const string administratorRole = "Administrator";
        const string email = "noreply@your-domain.com";

        await CreateDefaultAdministratorRole(rm, logger, administratorRole);
        var user = await CreateDefaultUser(um, logger, email);
        await SetPasswordForDefaultUser(um, logger, email, user);
        await AddDefaultRoleToDefaultUser(um, logger, email, administratorRole, user);
    }

    private static async Task CreateDefaultAdministratorRole(RoleManager<IdentityRole> rm, ILogger<DbInitializer> logger, string administratorRole)
    {
        logger.LogInformation($"Create the role `{administratorRole}` for application");
        var ir = await rm.CreateAsync(new IdentityRole(administratorRole));
        if (ir.Succeeded)
        {
            logger.LogDebug($"Created the role `{administratorRole}` successfully");
        }
        else
        {
            var exception = new ApplicationException($"Default role `{administratorRole}` cannot be created");
            logger.LogError(exception, GetIdentiryErrorsInCommaSeperatedList(ir));
            throw exception;
        }
    }

    private static async Task<ApplicationUser> CreateDefaultUser(UserManager<ApplicationUser> um, ILogger<DbInitializer> logger, string email)
    {
        logger.LogInformation($"Create default user with email `{email}` for application");
        var user = new ApplicationUser(email, "First", "Last", new DateTime(1970, 1, 1));

        var ir = await um.CreateAsync(user);
        if (ir.Succeeded)
        {
            logger.LogDebug($"Created default user `{email}` successfully");
        }
        else
        {
            var exception = new ApplicationException($"Default user `{email}` cannot be created");
            logger.LogError(exception, GetIdentiryErrorsInCommaSeperatedList(ir));
            throw exception;
        }

        var createdUser = await um.FindByEmailAsync(email);
        return createdUser;
    }

    private static async Task SetPasswordForDefaultUser(UserManager<ApplicationUser> um, ILogger<DbInitializer> logger, string email, ApplicationUser user)
    {
        logger.LogInformation($"Set password for default user `{email}`");
        const string password = "YourPassword01!";
        var ir = await um.AddPasswordAsync(user, password);
        if (ir.Succeeded)
        {
            logger.LogTrace($"Set password `{password}` for default user `{email}` successfully");
        }
        else
        {
            var exception = new ApplicationException($"Password for the user `{email}` cannot be set");
            logger.LogError(exception, GetIdentiryErrorsInCommaSeperatedList(ir));
            throw exception;
        }
    }

    private static async Task AddDefaultRoleToDefaultUser(UserManager<ApplicationUser> um, ILogger<DbInitializer> logger, string email, string administratorRole, ApplicationUser user)
    {
        logger.LogInformation($"Add default user `{email}` to role '{administratorRole}'");
        var ir = await um.AddToRoleAsync(user, administratorRole);
        if (ir.Succeeded)
        {
            logger.LogDebug($"Added the role '{administratorRole}' to default user `{email}` successfully");
        }
        else
        {
            var exception = new ApplicationException($"The role `{administratorRole}` cannot be set for the user `{email}`");
            logger.LogError(exception, GetIdentiryErrorsInCommaSeperatedList(ir));
            throw exception;
        }
    }

    private static string GetIdentiryErrorsInCommaSeperatedList(IdentityResult ir)
    {
        string errors = null;
        foreach (var identityError in ir.Errors)
        {
            errors += identityError.Description;
            errors += ", ";
        }
        return errors;
    }
}

First a new Administrator role is created. In my application this is the highest role a user can have. When the role is created, a new default user is created with the earlier provided constructor. After the user is created, the user needs a password to sign into the application. So a password is set. The last step is to connect the user to the Administrator role so he has all the permissions that he needs.

For logging, I use the default logging extension framework provided by dotnet core. I connected Serilog to the logging extension for better control.