This blog explains how to create custom code analysis rules in Visual Studio 2013 and how to debug them in Visual Studio 2013.
Create a custom code analysis rule
Start with creating a new class library. Rename the generated ‘Class1’ to ‘BaseRule’.
Add references in your class library to:
- FxCopSdk
C:\Program Files (x86)\Microsoft Visual Studio 12.0\Team Tools\Static Analysis Tools\FxCop\\FxCopSdk.dll - Microsoft.Cci
C:\Program Files (x86)\Microsoft Visual Studio 12.0\Team Tools\Static Analysis Tools\FxCop\\Microsoft.Cci.dll - Microsoft.VisualStudio.CodeAnalysis
C:\Program Files (x86)\Microsoft Visual Studio 12.0\Team Tools\Static Analysis Tools\FxCop\\Microsoft.VisualStudio.CodeAnalysis.dll
In the BaseRule class we have to identify how the rules are named and where they could be found. To do this change the code in the BaseRule class.
using Microsoft.FxCop.Sdk;

namespace CustomCodeAnalysisRules
{
	public abstract class BaseRule : BaseIntrospectionRule
	{
		protected BaseRule(string name)
			: base(

				// The name of the rule (must match exactly to an entry
				// in the manifest XML)
				name,

				// The name of the manifest XML file, qualified with the
				// namespace and missing the extension
				typeof(BaseRule).Assembly.GetName().Name + ".Rules",

				// The assembly to find the manifest XML in
				typeof(BaseRule).Assembly)
		{

		}
	}
}
Now we have the framework for our new custom code analysis rules. In this example we are creating a custom rule that says that fields are not allowed. We are creating this rule because our team doesn’t want any fields in Data Transfer Objects (DTO).
We name the custom rule ‘NoFieldsAllowed’, so create a class with the name ‘NoFieldsAllowed’. The rule is inherit from our BaseRule so we can give the name of the rule to the base class.
using Microsoft.FxCop.Sdk;

namespace CustomCodeAnalysisRules
{
	internal sealed class NoFieldsAllowed : BaseRule
	{

		public NoFieldsAllowed()
			: base("NoFieldsAllowed")
		{

		}
	}
}
Next we have to say for which type of access modifiers the rule is made for. We can do this be overriding the ‘TargetVisibility’ property. We want to make this rule for all access modifiers so we have to use ‘TargetVisibilities.All’.
// TargetVisibilities 'All' will give you rule violations about public, internal, protected and private access modifiers.
public override TargetVisibilities TargetVisibility
{
	get
	{
		return TargetVisibilities.All;
	}
}
The setup for the rule is complete so we can write the implementation. Override the ‘Check’ method for a ‘Member’. Cast the member that you get as parameter to a ‘Field’. Check if the Field is ‘null’. If so, the check is not for this member.
public override ProblemCollection Check(Member member)
{
	Field field = member as Field;
	if (field == null)
	{
		// This rule only applies to fields.
		// Return a null ProblemCollection so no violations are reported for this member.
		return null;
	}
}
If this member is a field we have to create a ‘Problem’ and a ‘Resolution’. To create a resolution you must create a ‘Rules.xml’ file in your project.
<?xml version="1.0" encoding="utf-8" ?>
<Rules FriendlyName="My Custom Rules">
	<Rule TypeName="NoFieldsAllowed" Category="CustomRules.DTO" CheckId="CR1011">
		<Name>No Fields allowed</Name>
		<Description>Check if fields are used in a class.</Description>
		<Resolution>Field {0} is not allowed. Field must be removed from this class.</Resolution>
		<MessageLevel Certainty="100">Warning</MessageLevel>
		<FixCategories>NonBreaking</FixCategories>
		<Url />
		<Owner />
		<Email />
	</Rule>
</Rules>
You can add the following information to the ‘Resolution’:
- Display name of the rule.
- Rule description.
- One or more rule resolutions.
- The MessageLevel (severity) of the rule. This can be set to one of the following:
- CriticalError
- Error
- CriticalWarning
- Warning
- Information
- The certainty of the violation. This field represents the accuracy percentage of the rule. In other words this field describes the rule author’s confidence in how accurate this rule is.
- The FixCategory of this rule. This field describes if fixing this rule would require a breaking change, ie a change that could break other assemblies referencing the one being analyzed.
- The help url for this rule.
- The name of the owner of this rule.
- The support email to contact about this rule.
Now we have the information to show as a Resolution. We only have to show it to the user in Visual Studio. So expand the ‘Check’ method by creating a ‘Resolution’ and add it to the ‘Problems’ list of the base class.
public override ProblemCollection Check(Member member)
{
	Field field = member as Field;
	if (field == null)
	{
		// This rule only applies to fields.
		// Return a null ProblemCollection so no violations are reported for this member.
		return null;
	}

	Resolution resolution = GetResolution(
		  field  // Field {0} is not allowed. Field must be removed from this class.
		  );
	Problem problem = new Problem(resolution);
	Problems.Add(problem);

	// By default the Problems collection is empty so no violations will be reported
	// unless CheckFieldName found and added a problem.
	return Problems;
}
Test your Custom code analysis rule
To test your custom rule we can add some fields to your custom rule class. So add under the ‘Check’ method the following fields.
private string testField1 = "This should give an error!!!";
private const string testFieldconst1 = "This should give an error!!!";
protected string testField2 = "This should give an error!!!";
internal string testField3 = "This should give an error!!!";
public string testField4 = "This should give an error!!!";
public const string testFieldconst4 = "This should give an error!!!";
To test this we are going to change the “Start Action” of your class library. Open the properties of your class library and navigate to the ‘Debug’ tab.
Change the ‘Start Action’ to ‘Start external program’. Use as external program ‘FxCopCmd.exe’ from your Visual Studio directory. For me it is: ‘C:\Program Files (x86)\Microsoft Visual Studio 12.0\Team Tools\Static Analysis Tools\FxCop\FxCopCmd.exe’.
Use as Command line arguments: ‘/out:”results.xml” /file:”WebCommBack.CustomCodeAnalysisRules.dll” /rule:”WebCommBack.CustomCodeAnalysisRules.dll” /D:”C:\Program Files (x86)\Microsoft Visual Studio 12.0\Team Tools\Static Analysis Tools\FxCop”‘.
Use as working directory your debug folder in the bin folder of this class library.
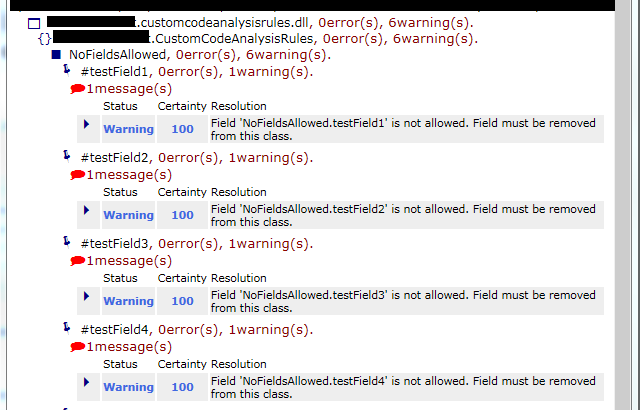
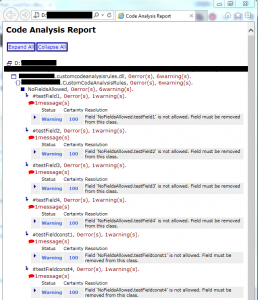
Now run your application with Debug. You will see a command prompt showing up. This will check your fields with your rules. The outcome of the test will be written in your debug folder. There you will find a ‘results.xml’ file. If you open it in ‘Internet Explorer’ you will see the information. Of course you can open it in every xml tool.
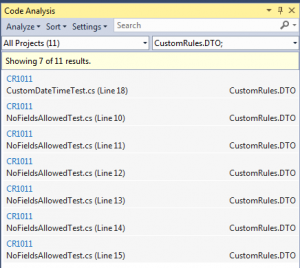
If your test is what you’ve expected, you can use your custom code analysis dll in your ruleset for your application. See here the outcome an application that uses the custom dll.


